Tuesday, August 23, 2011

Dressing Room Reveal!!

You have no idea how excited I am to finally publish this post.  I first posted about converting the sitting room off our master bedroom into a dressing room back in February.  FEBRUARY people!  That is SIX MONTHS ago.  I guess I won't be too too hard on myself.  I managed to sneak in a few other side projects along the way like new chairs, a stenciled rug, a painted porch ceiling and my campaign dresser.

Hmm...when I write it out like that, suddenly I don't feel so bad. But either way, thank you all for being so patient with me.  I shall reward you with approximately 9,000 pictures of this room.

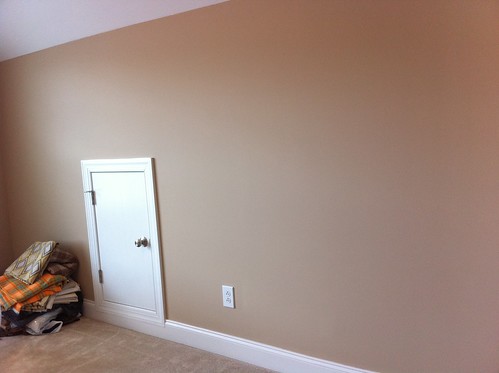
Let's recall what this room started off as, shall we?


I think it's safe to say, it started off as a whole lot of nothing.

Here it is in progress.


Here is the same view into that room now!
 

Left wall before:
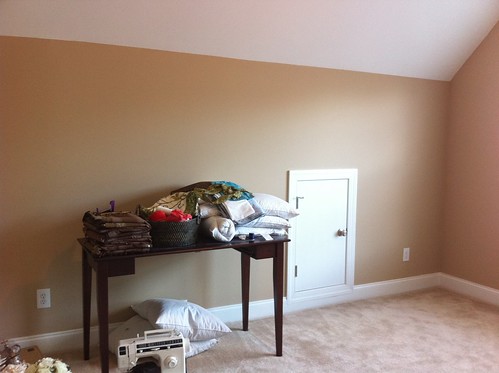
 

Left wall in progress:

Left wall after:


Remember my 6 year old-esque drawing of each side?  With a few tweaks here and there, it actually came out pretty close to how I originally imagined it.  


One of the things I really wanted on my side was a makeshift vanity surface.  Someplace I could mount a mirror and display my jewelry.  I have a thing for big, fun necklaces and I found that I was never wearing them because they were tucked away in a drawer.  So I purposefully sacrificed hanging storage space in exchange for a solid shelf vanity surface.  A vintage mirror finishes off the space.


I used a vintage ceramic glove mold to hold some of my chunkier necklaces.  I love this because it keeps them out in the open and I'm wearing them much more as a result.


I mounted 2 of these knobs right on the wall and am using them to hang a few other necklaces.


My everyday jewelry sits on its own little perch right near a framed pic of my favorite people in the world.   The bracelet draped over the frame is vintage from my day at The Liberty Antiques Festival.


Overall, I'm really pleased with how this little spot turned out.


I also got to put to use some of my favorite hardware that I've been hoarding.  These are pretty but also serve a really important purpose - they keep odds and ends from ending up on top of the ottoman!


Right wall before:  


Right wall in progress:


Right wall after:


I don't LOVE this full length mirror but we had it and I fit it perfectly between the 2 sides of shelving.  It hides that weird small door but still allows us access to it when needed.  

And my original drawing:


I used wood hangers throughout the room but switched to the non-slip slim hangers when it came to Mr. H+F's work pants which kept slipping off the wood. 


This light was a bit of a compromise (see the others I considered here).  Left to my own devices, I would have opted for a crystal-laden, super glam chandelier.  But Mr. H+F quickly reminded me that he had to get dressed in there everyday too.  We settled on this light and I actually love it.  It's throws off a great glow and is made of woven metal over a silk diffuser.


You know I agonized over which way to go with the curtains in here.  Ultimately I decided to go for super bright yellow silk dupioni and I am SO HAPPY I did.  They add the perfect bright happiness to the room that I wanted.  Afterall, I start and end virtually every day in this room!


Finally, without a doubt my most favorite thing in the room - my super tufted velvet ottoman.  It adds the perfect bit of funky glam the room needed and manages to remain gender neutral.  Mr. H+F loves it...success! 


One final look at the whole room! 

Well that's it!  I hope it was worth the wait (that's a joke).  All in all, we are really enjoying this room.  It's brought great purpose to a once completely dead space in our home.  And we love having all our clothes out in the open.  It keeps you really honest and there's no hiding when you truly don't need yet another blue button down or black skirt, etc. 

{Sources}
Shelving System:  Container Store elfa in platinum and walnut finishes
Ottoman Fabric:  Schumacher via Furbish Studio
Ottoman:  Custom made to my specs by ABZ Upholstery
Curtain Fabric:  eBay via this seller
Hooks:  Anthropologie 
Knobs:  Anthropologie
Silver frame:  Pottery Barn but discontinued
Vintage glove mold:  Raleigh Flea but you can find lots on eBay here
Wood Hangers:  IKEA 
Non-slip Hangers:  Amazon

Featured on:


IHeart Organizing


Linked up at:
Metamorphosis Monday
Bunny Hop Wednesday 
Southern Lovely

Roomspiration

Tuesday, May 24, 2011

Help me finalize Dressing Room Curtains!!!

The dressing room project has dragged on long enough. I'm determined to finish it off once and for all by the end of this month. The only 2 things left on my list are window treatments and an ottoman. I am sewing up curtains this weekend while my family is in town and am STILL going back and forth on what to do. So I'm turning to you guys to help finalize this once and for all!

As a reminder, the walls are painted Magnolia Grandiflora from Martha Stewart's paint line for Home Depot. It is a super pale pink.


The other main element in the room (besides our clothes of course) are the shelving units themselves - Container Store elfa in walnut & platinum.


So given all that do I go with my original thought of bright yellow dupioni silk OR indigo & cream ikat? FYI both of these are just raw pieces of fabric draped over the rod right now. They would both be floor length when I sewed them into actual curtains.


Those iPhone photos are terrible so here's a better look at the fabrics.


Sunny yellow silk dupioni??


OR indigo & cream ikat??


I seriously think I've just been staring at both options for too long and am paralyzed. HELP! I need to get this done!

Monday, April 11, 2011

An Accessories Closet & Update on my Dressing Room

A whole closet dedicated to sparkly baubles, handbags and shoes? Yes please! See more of it here.


Update on my own dressing room project: I'm sooooo close. I just have a few things to finish up but they are taking forever. I've posted a few progress photos over on my Facebook page but there are still some big things to finish up before I can share it with you guys!

Windows: I'm working on the curtains this week. Not the yellow silk I had originally considered but I'm still pretty excited about them.

Ottoman: I can't for the life of me find one that is both the right proportion AND color so I'm considering having one made because I'm pretty sure the one I want is beyond my DIY capabilities.

Vanity: Well you can't exactly have a vanity without a mirror can you? And the one I found at an antique shop in Massachusetts sadly didn't make its way home with me. Let's call a gross miscalculation in my luggage/carry-on situation traveling back with Knox. So it's sitting in my brother's apartment, never to find its way to a UPS store, I'm sure. Maybe if I publicly call him out on my blog I can spur some action :) And the black and white version of this tray that I want to corral all my odds and ends is out of stock for a few more weeks.

Rug: To rug or not to rug? There is wall to wall carpeting in there currently. The rug I want is perpetually out of stock at IKEA and the rug I REALLY want is so far out of my price range, it makes me want to throw up a little.

Ugh, I hate the end of projects like this when everything you need to wrap it up is out of stock/out of reach. I will persevere!

Friday, March 25, 2011

RIP Imperial Trellis Dream

Somewhere right now Kelly Wearstler is laughing at me. She's lounging about her L.A. manse in some fabulous designer gown (vintage of course), surrounded by rolls and rolls of imperial trellis wallpaper and she. is. laughing.

kelly-wearstler

Please recall I had decided to try my hand at stenciling a wall in the dressing room. Inspired by this post, I decided a stencil of Kelly's fab imperial trellis pattern would be the perfect finishing touch to the walls in there.

Things didn't start off great. After tracing my first stencil, I started cutting, only to realize the intricate pattern was making me cross eyed with confusion. I completely lost track of the negative and positive space on the stencil and the whole thing fell apart.


I started over, re-tracing another stencil, this time dummy-proofing it for myself by taking a Sharpie to the negative space I needed to cut out. The little connectors you see within the pattern are important too. Without them, the entire pattern falls apart. I'd need to go back and touch up these spots after the design was dry to form the continuous imperial trellis pattern.


The completed stencil was pretty large which was maybe part of my problem. I decided a large stencil would let me get the job done quicker. That may have been true, but any efficiency I gained by making the stencil larger was very quickly eclipsed by how insanely clumsy and unwieldy the stencil was to handle.


I started in the corner figuring if I could be successful on that totally straight area (free of the window frame and pitched ceiling) then it would be worth it to keep going and tackle the trickier areas of the wall.

Here it is after 3 passes. At this point, it definitely wasn't perfect but I was liking it and was encouraged to keep going.


But then everything started to go wrong. Because the contrast between my wall and the pearlescent paint was so subtle, it was difficult to judge when there was enough paint. Hence I started ending up with spots like this. *Sigh*


And then I hit the window frame and it was all downhill.


To say maneuvering the stencil around the frame was tricky would be a huge understatement. It was pretty damn impossible. Every time I peeled the stencil away I was getting sadder. I should also mention that metallic paint is not at all forgiving to work with. It was very clear what sections of the wall got hit with 2 coats of paint vs. 1.


Overlapping the stencil and lining it up just so was super time consuming. Progress was slow but that's not necessarily something I would have minded if the result was great. Unfortunately, it just wasn't. It was at best ok...from a distance. And while I certainly didn't 't plan to stare at this wall from 3 inches away, clumps and smudges and bare spots just wouldn't do. They would seriously keep me up at night. It looks ok in this image but I promise, it just wasn't. Sad...


Bottom line - I decided to stop after doing this one section of the wall. I HATE when I can't finish something or something doesn't come together like I plan. But I hate shoddy results even more. So I have to accept defeat :(

RIP imperial trellis stencil. I'm sad to see you go...


If you're thinking of tackling an intricate stencil project like this, learn from my mistakes:

1. Avoid a wall with a lot of angles. Maybe if the wall I was working on didn't have a window and a pitched ceiling I could have gotten better results.

2. Don't get greedy and make a great big stencil to save time. Maybe if my stencil had been smaller, it wouldn't have been so hard to work with.

3. Avoid metallic paint. It looks awesome but damn is it unforgiving.

So there you have it...DESIGN FAIL! Now I'm off to paint over this area and put this defeat behind me.