Welcome to the ScotchBlue™ Painting Party! What the heck is that you're saying? Fun with paint! What could be better?

A group of fantastic DIY bloggers all completed projects with the help of ScotchBlue™ Painter’s Tape with Edge-Lock™ Paint Line Protector. I am totally flattered and humbled to be in the company of some of my very favorite bloggers in this event and yours truly is at the very start of the party, WOOT!
- Dina @ Honey and Fitz *You are here!*
- Chrissie @ Chrissie’s Collections *You'll go here next, but not before you've seen my project!*
- Shelley @ The House of Smiths
- Mandi @ Vintage Revivals
- Brooke @ All Things Thrifty
1. Comment on this post and share how you’d use ScotchBlue™ Painter’s Tape in your next project!
2. For a second chance to win, tweet @ScotchBlueBrand “I want #supersharppaintlines for my next project!”
3. Go leave some link love for the other blogs in the party listed above. They’ll all be giving away samples too!
So now onto my project. Remember my roundup on all those lovely rooms with stripes? Or my debate on what colors to use to achieve the graduated stripes pictured here.

Yup, I had stripes on the brain. So when the lovely folks at ScotchBlue™ asked me to take part in their Painting Party, I knew just what I'd do with their tape!
After much debate over grays vs. blues, I finally decided that the blues were my favorite and went ahead with this color palette.

The room started off sporting a very uninspired "builder beige". (note the attractive dog crate styling)

The first thing I did was paint the entire room in the lightest color in my palette - Sherwin Williams Pure White. I could have skipped this step and just done white stripes in addition to the blue stripes. Painting the whole room was my way of covering over the existing paint and not having to worry about multiple coats at the stripe stage. Here is my white base coat all set to go.

The next step was to determine the width of my stripes. Like my inspiration image, I wanted fairly wide, uniform stripes. I measured the height of my wall (minus the height of the base board) at 103.5". Then it was just a process of trial and error to get some stripe widths that would evenly divide into 103.5". I landed on 12.75" inch stripes with slightly wider stripes at the floor and ceiling. I created a little diagram for myself so I could keep the stripe colors straight when I started painting.
I HIGHLY recommend this step. You'll be buried in a pile of painter's tape before you know it. Make the painting part as mindless as possible.

The next step was fairly simple. Just lots of measuring and taping. I took my tape measure and marked 13.5" up from my baseboard at about 15" intervals along the wall.

Then with the help of a yardstick and level, I connected the marks I made in the previous step.


Then it was ScotchBlue tape time! I taped off the line I just drew and labeled the color I would be painting. I actually placed the tape just a hair above (or below depending on the stripe I was painting) the pencil line. Then I just painted right over it. No need to erase!

Keep measuring, taping and labeling...

Until you have this! This stage is time consuming but it pays to be diligent and patient. Your end result depends on it.

Now let's stop for a moment and discuss tape placement. This particular stripe design is a little more time intensive because all of the colors butt up against one another. So you'll have an additional middle step of moving the tape surrounding one stripe.
STEP ONE: PAINTING YOUR DARKEST STRIPE
Here's a diagram illustrating tape placement that should help. In step one (dark stripe), you are taping out lines to help you paint the dark stripe and to keep the white stripe pristine. Note that you will tape ABOVE the line you drew for the dark color, ABOVE the line you drew for the medium color but BELOW the line you drew for the white. This is to insure that when you paint the second dark stripe (second from the bottom) you are painting it right up against what is to be your white stripe.

STEP TWO: PAINTING YOUR MEDIUM STRIPE
After the darkest blue stripes were painted and dry, I moved the tape along the top edge of the dark blue stripe down so that now the tape was partly on the dark stripe and was creating the bottom edge for the medium blue stripe to be painted above it. It sounds far more complicated that it is...just requires some planning and thought.
Left: Tape above line for dark blue stripe
Right: Tape moved below line for medium blue stripe


Here is the wall at step 2 with all the tape moved in preparation for painting the medium stripes. Hard to see here but everywhere you see a blue stripe, I have moved the tape at the top of the stripe down so that it's now actually on the painted area and creating the bottom edge of the medium stripe.

If you were doing a striped pattern like this below, this step wouldn't matter. While there are multiple colored stripes on this wall, they are all separated by the base white wall color.

TIPS FOR ACHIEVING CRISP PAINT LINES:
1. Roll your paint onto the main area of your stripe in a horizontal fashion. DO NOT roll up against the tape edge. Doing so will almost surely result in paint bleeding up under the tape.

2. Fill in the areas near the tape with a brush. Place your brush on the tape and paint away from the edge. DO NOT paint up into the tape edge. Doing so will almost surely result in paint bleeding up under the tape.

3. Remove your tape while the section you just painted is still wet. Working with a wet edge is key. If you wait until the section is dry, the paint will have dried over the tape and will pull paint away when you remove the tape. Remove when wet, remove slowly and pull toward the painted section, not away.
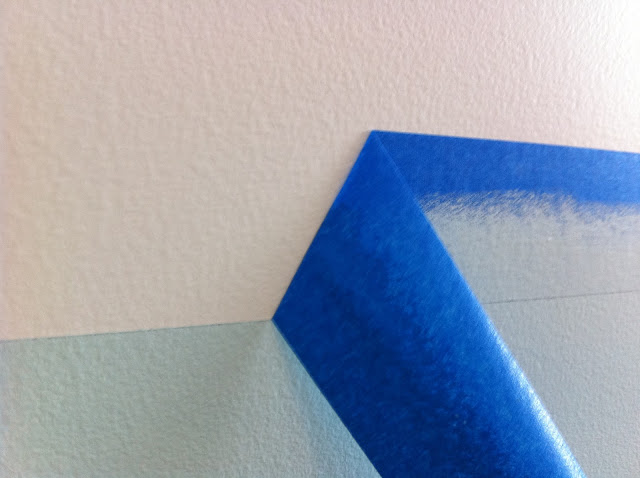

3 rolls worth of tape later...


Before:
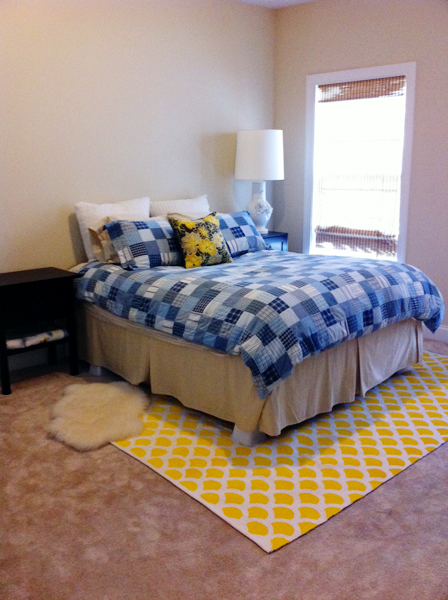
After:

I have to say, it was definitely a lot of work with the waiting for stripes to dry and moving tape around but I am totally in love with the result. Don't the stripes make the room look so much bigger? It's amazing!
Now let's here it! What would you do with some ScotchBlue™ Painter's Tape of your own? Leave a comment below to be entered to win some.
And for more fantastic projects, inspiration, and tutorials, head over to my fellow party pals at:
Chrissie @ Chrissie’s Collections
Shelley @ The House of Smiths
Mandi @ Vintage Revivals
Brooke @ All Things Thrifty
Be sure to "like" ScotchBlue over on Facebook to see the schedule and participants for any upcoming Painting Parties.
Full Disclosure:
ScotchBlue Brand reached out to me to participate in the ScotchBlue Painting Party to celebrate the launch of their new ScotchBlue Painter’s Tape with Edge-Lock Paint Line Protector. My post represents my honest experience with ScotchBlue Painter’s Tape. I am not being paid for my answers, but I did receive ScotchBlue Painter’s Tape to assist in completion.
Linked up:
Southern Lovely


