Tuesday, April 24, 2012

My Homeless DIY Gold Angel Wings

I've been saving images of gilded angel wings in decor for a long time. I especially love them in a bedroom.  The idea of sleeping under angel wings just invites a lovely night of sleep doesn't it? 


The problem was every time I came across a pair of pretty, gilded angel wings with lots of carved wood details, they were many, many hundreds of dollars.   I had pretty much put "gold angel wings" at the bottom of my list when I came across this listing on eBay (aside: random, eBay "window" shopping is sooooo dangerous...if you've had some wine, forget it...it's deadly.}  I love when auctions have a "make offer" button.  It's like getting your flea market price haggling fix without even leaving your couch.  I put in an offer of $125, the seller countered with $137, I countered with $137 + free shipping - and it was accepted! 


I liked the carved feather details and the size (46" tall!!!) I didn't love the weathered, cottage-y paint treatment but for the price, I thought it might be worth trying to DIY a gold finish on them.


I considered using gold leaf sheets but ultimately decided I'd need way too many sheets to cover a surface so large.  And I really didn't want a one dimensional finish.  It needed to be gold but vintage-y looking so the feather details really stood out. 

I picked up two pots of the new Martha Stewart metallic paints at The Home Depot - Vintage Gold and Black Coffee glaze.  My idea was to use the vintage gold as the base and then go back with the black coffee glaze to get into all the nooks and crevices to give it more definition. 


Here is one of the wings after two coats of the Vintage Gold.  I wasn't loving it.  It looked very flat to me...not at all the gilded look I was hoping for.


See what I mean?  Definitely an improvement over that shabby chic paint job they started with but still so blah.  


I really wasn't satisfied with this result.  I always have some of this Rustoleum metallic gold spray paint on hand.  You never know when you're gonna need to make something gold right?  No but seriously, it's got a great sparkle to it.   Since I wasn't happy with the Martha gold I figured I'd spray it and see what happened. 


It turned out to be just the right shade of gold.  Warm and deep instead of that weird, boring bronze color. 


I had both wings sprayed gold in just a few minutes.  I really liked the way they were looking but I wanted to highlight the detail in the feathers a bit more.  I should tell you that I'm certain this is not the correct way to use this metallic glaze.  But I tried it and it totally worked for me so who cares?  Basically I used a sponge brush to dab on some glaze in small areas, then I used a rag to wipe most of it off. 


The result was exactly what I wanted - a mostly gold surface with some depth and definition to the carved details. 


Here's the part where this story get sad.  So now I have my gold angel wings and I actually really love how they turned out.   I think it's safe to say this is my last DIY project before the big move.  I was all excited to mount them over our bed when we decided we were moving and would be selling the house.  Our realtor quickly neg'd the idea.  Something about turning off buyers...apparently not everyone shares my sentiment about sleeping under angel wings. 


So for now their gilded prettiness sits sadly tucked into the back of a closet awaiting moving day.  Homeless angel wings :(

I have no idea if they'll work in our new home or if there will be a wall big enough for them. *sigh*

Oh well...maybe I can get creative and do something like this with them.


Tuesday, April 3, 2012

IKEA Malm Dresser Makeover with O'verlays


I have been wanting to experiment with O'verlays ever since they came out.  I think the product is ingenious and the perfect way to elevate even the most mundane big box furniture.  So when my friend Christiane started thinking about redoing an old IKEA Malm dresser to use in her son Hudson's room, I jumped at the chance to help!

Hudson's room has some great roman shades made of Dwell Studio's Dotscape in Major Brown. 


And his ceiling is painted this super fun green.


After some brainstorming, we decided to pair a smokey, high gloss gray on the overall dresser with the Lolita circle O'verlays to play off the circle motif started on his roman shades.  Painted in the same green as the room's ceiling, it really brings the whole color scheme together.

I'm not going to re-invent the wheel and give you a whole tutorial on how to paint the dresser.  I'll defer to Kate's excellent posts on how to do that here.  I taped, primed (using my favorite primer - Zinsser Cover Stain) and painted it very easily since the Malm is just a bunch of flat surfaces with no nooks or details to speak of.  Pretty much a furniture painters dream!


There aren't a ton of colors in the Rustoleum Protective Enamel Oil line but if you can find one that works for your project I HIGHLY recommend it.   They're sold near the spray paints and come in quart size which is perfect for a small project like this.  And the best part - they're only about $8!  Yes, oil paint can be a pain to work with and clean up but I think it's completely worth the trouble for the professional looking finish you get.  Just be sure to follow your local waste regulations for disposing of your oil based paint cans.


After a couple of coats with a brush, I had this glass-like, perfectly glossy surface.  Oil paint takes a lot longer to dry than latex so resist the urge to touch it or do a second coat until you've let it completely dry (overnight is best).


So that was the easy part!  But then I got started on painting the O'verlays themselves and thought I was going to die.  My recommendation to you if you're considering using and painting some O'verlays - SPRAY PAINT, SPRAY PAINT, SPRAY PAINT!  Pick a color that you can spray on and don't look back.  

Since I wanted to match the O'verlays to the existing ceiling color, I started by rolling my paint on.  


 That was fine, except for this...


See all those totally-unreachable-by-a-roller nooks? After debating everything from hand painting all of them with a foam brush (aaaaargh!!!) to physically dipping the entire O'verlay into the can of paint (and then dealing with drips!), I remembered I had this Martha Stewart Crafts spray paint kit in my craft supplies.  The instructions make it pretty clear that it's for use with acrylic/craft paints but I was desperate. 


And guess what?!  IT WORKED!!!  The process for using the kit couldn't be easier.  You simply mix your paint with the spray paint medium included in the kit in a 1 to 1 ratio, attach the sprayer and start spraying.  You can watch Martha demo the process here.  About 2 oz of my Benjamin Moore latex paint is all it took to get complete coverage on all my O'verlays and save me hours of hand painting and cursing up a storm. I stuck them on with a little bit of Liquid Nails.


Here it is in Hudson's super cute room.


So let's recap what we've learned:
1.  Oil paint is awesome
2.  O'verlays are awesome
3.  When in doubt, spray, do not brush
4.  Go buy the Martha Stewart Crafts spray paint kit

Friday, September 9, 2011

Before and After happiness from Amy Meier

I first discovered the crazy talented Amy Meier when I saw her home office featured in BHG.  I instantly loved everything about her style.  Casual and classic, vintage and texture filled.  In other words, perfect.  The nursery she's created for her soon-to-be baby is too cute for words.

I've been neglecting other aspects of my life and instead devouring all the projects on her blog.  If you're a fan of dramatic before and afters (who isn't?), today's post is for you!  She's like a transformation fairy godmother!

Before


After


Before


After (love how she treated those potentially awkward and small windows!)

Before


After (love the architectural details she built into this space.  Those columns and that ceiling!!)


Before


After

 Before


After

Before


After (I LOVE this living room makeover she did for Abigail of 5th Joy)


The woman has crazy skills right?  See more of her work here and her blog here.

Tuesday, August 23, 2011

Dressing Room Reveal!!

You have no idea how excited I am to finally publish this post.  I first posted about converting the sitting room off our master bedroom into a dressing room back in February.  FEBRUARY people!  That is SIX MONTHS ago.  I guess I won't be too too hard on myself.  I managed to sneak in a few other side projects along the way like new chairs, a stenciled rug, a painted porch ceiling and my campaign dresser.

Hmm...when I write it out like that, suddenly I don't feel so bad. But either way, thank you all for being so patient with me.  I shall reward you with approximately 9,000 pictures of this room.

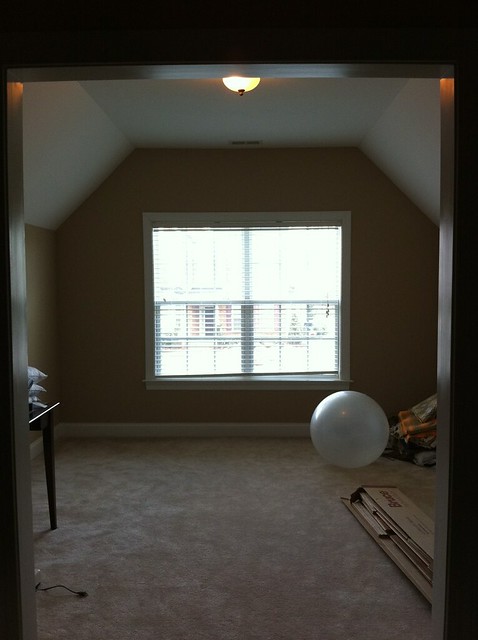
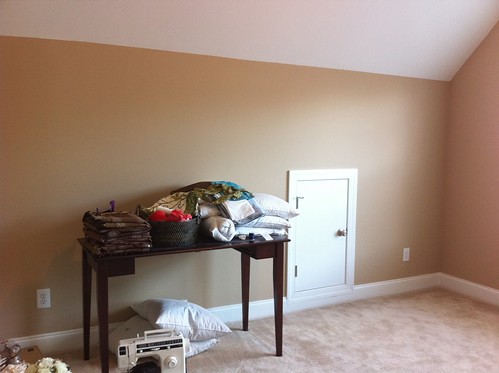
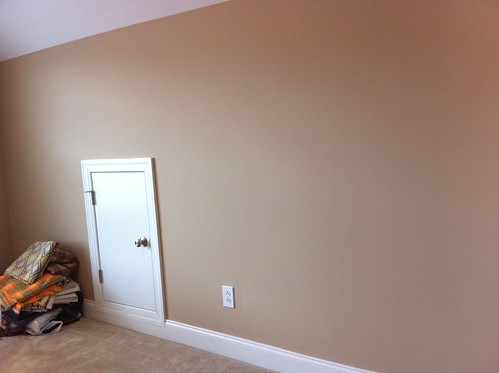
Let's recall what this room started off as, shall we?


I think it's safe to say, it started off as a whole lot of nothing.

Here it is in progress.


Here is the same view into that room now!
 

Left wall before:


Left wall in progress:

Left wall after:


Remember my 6 year old-esque drawing of each side?  With a few tweaks here and there, it actually came out pretty close to how I originally imagined it.  


One of the things I really wanted on my side was a makeshift vanity surface.  Someplace I could mount a mirror and display my jewelry.  I have a thing for big, fun necklaces and I found that I was never wearing them because they were tucked away in a drawer.  So I purposefully sacrificed hanging storage space in exchange for a solid shelf vanity surface.  A vintage mirror finishes off the space.


I used a vintage ceramic glove mold to hold some of my chunkier necklaces.  I love this because it keeps them out in the open and I'm wearing them much more as a result.


I mounted 2 of these knobs right on the wall and am using them to hang a few other necklaces.


My everyday jewelry sits on its own little perch right near a framed pic of my favorite people in the world.   The bracelet draped over the frame is vintage from my day at The Liberty Antiques Festival.


Overall, I'm really pleased with how this little spot turned out.


I also got to put to use some of my favorite hardware that I've been hoarding.  These are pretty but also serve a really important purpose - they keep odds and ends from ending up on top of the ottoman!


Right wall before:  


Right wall in progress:


Right wall after:


I don't LOVE this full length mirror but we had it and I fit it perfectly between the 2 sides of shelving.  It hides that weird small door but still allows us access to it when needed.  

And my original drawing:


I used wood hangers throughout the room but switched to the non-slip slim hangers when it came to Mr. H+F's work pants which kept slipping off the wood. 


This light was a bit of a compromise (see the others I considered here).  Left to my own devices, I would have opted for a crystal-laden, super glam chandelier.  But Mr. H+F quickly reminded me that he had to get dressed in there everyday too.  We settled on this light and I actually love it.  It's throws off a great glow and is made of woven metal over a silk diffuser.


You know I agonized over which way to go with the curtains in here.  Ultimately I decided to go for super bright yellow silk dupioni and I am SO HAPPY I did.  They add the perfect bright happiness to the room that I wanted.  Afterall, I start and end virtually every day in this room!


Finally, without a doubt my most favorite thing in the room - my super tufted velvet ottoman.  It adds the perfect bit of funky glam the room needed and manages to remain gender neutral.  Mr. H+F loves it...success! 


One final look at the whole room! 

Well that's it!  I hope it was worth the wait (that's a joke).  All in all, we are really enjoying this room.  It's brought great purpose to a once completely dead space in our home.  And we love having all our clothes out in the open.  It keeps you really honest and there's no hiding when you truly don't need yet another blue button down or black skirt, etc. 

{Sources}
Shelving System:  Container Store elfa in platinum and walnut finishes
Ottoman Fabric:  Schumacher via Furbish Studio
Ottoman:  Custom made to my specs by ABZ Upholstery
Curtain Fabric:  eBay via this seller
Hooks:  Anthropologie 
Knobs:  Anthropologie
Silver frame:  Pottery Barn but discontinued
Vintage glove mold:  Raleigh Flea but you can find lots on eBay here
Wood Hangers:  IKEA 
Non-slip Hangers:  Amazon

Featured on:


IHeart Organizing


Linked up at:
Metamorphosis Monday
Bunny Hop Wednesday 
Southern Lovely

Roomspiration