Tuesday, April 24, 2012

My Homeless DIY Gold Angel Wings

I've been saving images of gilded angel wings in decor for a long time. I especially love them in a bedroom.  The idea of sleeping under angel wings just invites a lovely night of sleep doesn't it? 


The problem was every time I came across a pair of pretty, gilded angel wings with lots of carved wood details, they were many, many hundreds of dollars.   I had pretty much put "gold angel wings" at the bottom of my list when I came across this listing on eBay (aside: random, eBay "window" shopping is sooooo dangerous...if you've had some wine, forget it...it's deadly.}  I love when auctions have a "make offer" button.  It's like getting your flea market price haggling fix without even leaving your couch.  I put in an offer of $125, the seller countered with $137, I countered with $137 + free shipping - and it was accepted! 


I liked the carved feather details and the size (46" tall!!!) I didn't love the weathered, cottage-y paint treatment but for the price, I thought it might be worth trying to DIY a gold finish on them.


I considered using gold leaf sheets but ultimately decided I'd need way too many sheets to cover a surface so large.  And I really didn't want a one dimensional finish.  It needed to be gold but vintage-y looking so the feather details really stood out. 

I picked up two pots of the new Martha Stewart metallic paints at The Home Depot - Vintage Gold and Black Coffee glaze.  My idea was to use the vintage gold as the base and then go back with the black coffee glaze to get into all the nooks and crevices to give it more definition. 


Here is one of the wings after two coats of the Vintage Gold.  I wasn't loving it.  It looked very flat to me...not at all the gilded look I was hoping for.


See what I mean?  Definitely an improvement over that shabby chic paint job they started with but still so blah.  


I really wasn't satisfied with this result.  I always have some of this Rustoleum metallic gold spray paint on hand.  You never know when you're gonna need to make something gold right?  No but seriously, it's got a great sparkle to it.   Since I wasn't happy with the Martha gold I figured I'd spray it and see what happened. 


It turned out to be just the right shade of gold.  Warm and deep instead of that weird, boring bronze color. 


I had both wings sprayed gold in just a few minutes.  I really liked the way they were looking but I wanted to highlight the detail in the feathers a bit more.  I should tell you that I'm certain this is not the correct way to use this metallic glaze.  But I tried it and it totally worked for me so who cares?  Basically I used a sponge brush to dab on some glaze in small areas, then I used a rag to wipe most of it off. 


The result was exactly what I wanted - a mostly gold surface with some depth and definition to the carved details. 


Here's the part where this story get sad.  So now I have my gold angel wings and I actually really love how they turned out.   I think it's safe to say this is my last DIY project before the big move.  I was all excited to mount them over our bed when we decided we were moving and would be selling the house.  Our realtor quickly neg'd the idea.  Something about turning off buyers...apparently not everyone shares my sentiment about sleeping under angel wings. 


So for now their gilded prettiness sits sadly tucked into the back of a closet awaiting moving day.  Homeless angel wings :(

I have no idea if they'll work in our new home or if there will be a wall big enough for them. *sigh*

Oh well...maybe I can get creative and do something like this with them.


Wednesday, March 28, 2012

DIY Recycled Toddler Table & Chairs


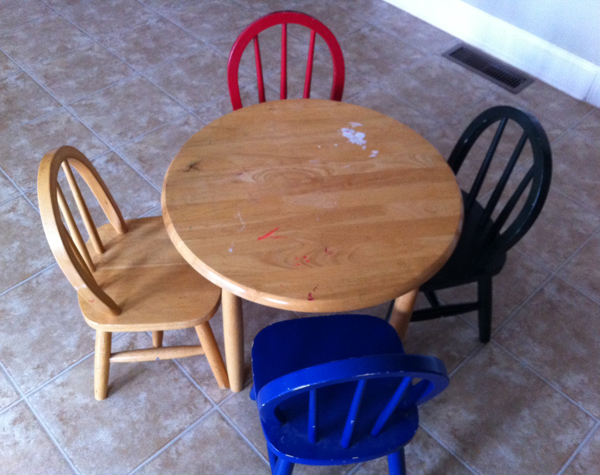
A few weeks ago while out on a family walk, we came across a neighbor getting rid of a very well loved but totally adorable mini table and chairs.  I've been on the lookout for a little set like this for Knox so when I saw these just sitting on the sidewalk being given away (yes, free!!) I snatched them right up!


While this set isn't exactly what I was planning to buy (I was going to go with a square top table with a craft paper roll attached + 2 Panton Jr chairs), I could not pass up the free price!  Plus I love that this set has already seen many hours of creative play.  A couple of the chair were covered in little heart shaped stickers and the table surface showed some definite signs of overzealous crafting.  I was determined to make it work and transform the set as cheaply as possible. 


A little Goo Gone lifted the stickers and residue right off.  I gave all the pieces a slight sanding and then got busy priming.


Zinsser Cover Stain is my go-to primer.  Especially for pieces that are going to see lots of action like these!  I used the brush on variety for the table top because it goes on a little thicker, thus giving you better coverage.


I started off brushing the primer on the chairs too and quickly abandoned the brush in favor of the spray variety.  All those nooks and spindles were killing me with the paint brush!


Once I switched to the spray primer , things went very fast and I had it all primed and ready for painting within 20 minutes.  


I knew a chalk top would be the easiest way to transform the table.  I felt like it was a good compromise for making a creative surface without mounting a craft paper roll like I had originally wanted (and couldn't figure out how to make work on a round top.)  Two coats of of Rustoleum chalk paint and I was done.


Priming the chairs with the spray primer convinced me that I absolutely had to find a spray paint color that would work.  NO HAND BRUSHING!  I settled on this pretty aqua color.  I wanted something that was gender neutral and would look pretty with the chalk tabletop.


Oh how I love spray paint!  This went so fast, I couldn't believe it.


Three cans, two coats on everything - I was done in less than an hour (and that includes drying time between coats!)


Once everything was dry, I wiped all the pieces down with a damp cloth, then finished them with 2 coats of Minwax polycrylic in clear semi-gloss.


The last step to any chalk paint project is to "condition" the surface by rubbing chalk all over it and then wiping it off with a dry cloth. 


Now the surface is ready to use!  I also love that this step makes the chalk a more subtle gray and not such a stark black.


Here's the finished set tucked into the corner of our family room.  I love it so much more than all the mismatched primary colors before!


And I have to say, the little Windsor back chairs are so adorable in this bright blue. I'm really happy I didn't ditch them and buy the more modern Panton, Jrs for this set (though someday they will be mine!)

I've put away two of the chairs because...


...rather than sit on them, Knox prefers to use them as a perch for his soliloquies.


One last look at the before & after side by side.  Amazing what some spray paint can do!

Thursday, March 22, 2012

DIY Easter Egg Garland


I love to decorate the house a little for the holidays but I hate
a. to spend a lot of money doing it and
b. to use up precious storage space to store said decorations until the following year.
So the cheaper, more disposable and/or recycle-able the better (hence my contact paper obsession for Halloween!)

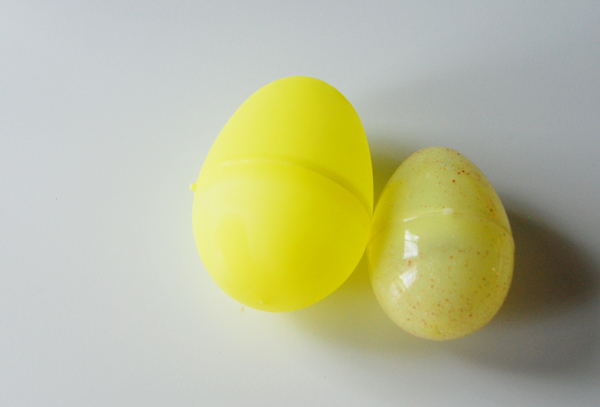
This DIY could not get any easier.  The only thing I bought were the ten packages of Dollar Store plastic Easter eggs.  All the other supplies I had around the house - some ribbon of varying widths, scissors and a needle and thread.  I used baker's twin but any sturdy thread will do.


For my garland, I used two different sized eggs.    


You probably never noticed this as a child (I certainly didn't) but all standard (read: cheap) Easter eggs have holes in the top and bottom, making them perfect for threading!

  
Start by cutting 6" lengths of 3/4" ribbon and thread them through your egg.  You'll have to do some maneuvering to get  it thru the hole.  A toothpick can help.


Once you've got it through, tie a knot to secure.
 

Repeat this process two more times.  Cut a long length of your thread (4-5' to start) and tie one end onto the knotted end of your ribbon.


Thread the other end onto your needle and feed it through the top of your egg.  Close up your egg and start adding on more eggs.  


Keep going until you've created a garland length you're happy with.  


Finish off the end of your garland the same way you started - by fishing 3 lengths of ribbon through the hole in the last egg, knotting it off and tying your thread around it.  

I ended up creating two garlands - 1 garland made of 42 large eggs (7 packages) and 1 garland of 42 small eggs (3 packages.)  I swagged them around my front door and sort of twisted them together at the corners and center. 


Once I had the garland up, I finished it with a hot pink bow at the center.   Everything looks better with a hot pink bow on it, right?


Cute right?  I love the way the little ribbon tails flutter in the breeze at the front door.

TOTAL COST:  $10 for the eggs!

Linked up at: