
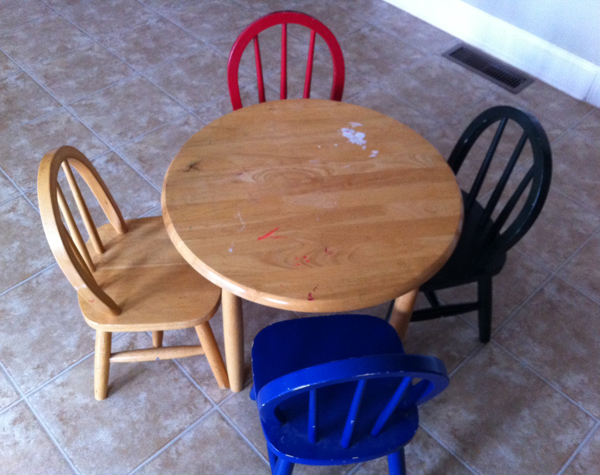
A few weeks ago while out on a family walk, we came across a neighbor getting rid of a very well loved but totally adorable mini table and chairs. I've been on the lookout for a little set like this for Knox so when I saw these just sitting on the sidewalk being given away (yes, free!!) I snatched them right up!
.jpg)
While this set isn't exactly what I was planning to buy (I was going to go with a square top table with a craft paper roll attached + 2 Panton Jr chairs), I could not pass up the free price! Plus I love that this set has already seen many hours of creative play. A couple of the chair were covered in little heart shaped stickers and the table surface showed some definite signs of overzealous crafting. I was determined to make it work and transform the set as cheaply as possible.
.jpg)
A little Goo Gone lifted the stickers and residue right off. I gave all the pieces a slight sanding and then got busy priming.
.jpg)
Zinsser Cover Stain is my go-to primer. Especially for pieces that are going to see lots of action like these! I used the brush on variety for the table top because it goes on a little thicker, thus giving you better coverage.
.jpg)
I started off brushing the primer on the chairs too and quickly abandoned the brush in favor of the spray variety. All those nooks and spindles were killing me with the paint brush!
.jpg)
Once I switched to the spray primer , things went very fast and I had it all primed and ready for painting within 20 minutes.
.jpg)
I knew a chalk top would be the easiest way to transform the table. I felt like it was a good compromise for making a creative surface without mounting a craft paper roll like I had originally wanted (and couldn't figure out how to make work on a round top.) Two coats of of Rustoleum chalk paint and I was done.

Priming the chairs with the spray primer convinced me that I absolutely had to find a spray paint color that would work. NO HAND BRUSHING! I settled on this pretty aqua color. I wanted something that was gender neutral and would look pretty with the chalk tabletop.
.jpg)
Oh how I love spray paint! This went so fast, I couldn't believe it.
.jpg)
Three cans, two coats on everything - I was done in less than an hour (and that includes drying time between coats!)
.jpg)
Once everything was dry, I wiped all the pieces down with a damp cloth, then finished them with 2 coats of Minwax polycrylic in clear semi-gloss.

The last step to any chalk paint project is to "condition" the surface by rubbing chalk all over it and then wiping it off with a dry cloth.


Now the surface is ready to use! I also love that this step makes the chalk a more subtle gray and not such a stark black.

Here's the finished set tucked into the corner of our family room. I love it so much more than all the mismatched primary colors before!

And I have to say, the little Windsor back chairs are so adorable in this bright blue. I'm really happy I didn't ditch them and buy the more modern Panton, Jrs for this set (though someday they will be mine!)

I've put away two of the chairs because...

...rather than sit on them, Knox prefers to use them as a perch for his soliloquies.

One last look at the before & after side by side. Amazing what some spray paint can do!


0 Comments:
Post a Comment