Tuesday, April 24, 2012

Bugaboo Neon Pop

Forget sewing a new canopy, someone get me some spray paint!! 

Just when I thought sewing up a new canopy cover for my Bugaboo pimped it out, I see this.  Check out the new special edition Bugaboo Cameleon Neon Pop - a navy blue chassis with neon red rims!  Exclusively sold at Nordstroms, it will retail for $1,059.


{photos courtesy of BabyGearGuide.com}

Are you kidding?!   I LOOOOOOOVE it. 

Wednesday, February 22, 2012

Things you should know about Vol. 2

You guys seemed to enjoy my last stream-of-consciousness "things you should know about" post so I'm back today with a second installment.  No rhyme or reason really...just stuff I've come across that I want to share.

Have you seen the newest campaign style furniture at World Market?  No it doesn't have the fancy brass pulls we all love but there are some sexy x-legs.  I particularly like this robin's egg beauty.  It's a like Parsons Desk meets campaign with its high gloss finish.  And only $200!!!


A perfectly proportioned corner changing table for those nurseries that are more nook than room.  This is so smart.


I'm always looking for ways to free up drawer space in the kitchen and currently one entire drawer is a zip lock/aluminum foil/plastic wrap jungle.  This little contraption only needs 5 1/4" of clearance and could easy be tucked into a cabinet above some juice glasses.  $9.71 and I've just reclaimed a full drawer of valuable kitchen real estate.  LOVE THAT!


Just the cutest hooded towels I've ever seen.  A viking hat with braids?!  Ridiculous cuteness. 


Indian Headress Hooded Towel


There's a whole bunch of new stuff at IKEA worth knowing about.  Rejoice IKEA Expedit fans!  The famous storage powerhouse now comes in high gloss gray and red.


Cribs are back at IKEA (they were recalled for a bit) and this new SUNKVIK in a pretty gray-brown is sure to show up in lots of modern, neutral nurseries.  For $119, you can't beat it!


Remember this post on kitchen utensil organization?  It featured this lovely image using what I'm sure are vintage ironstone pitchers ($$$) to corral various items. 


In lieu of a vintage ironstone pitcher collection, the rest of us can use these Sockerart white pitchers from IKEA.  They come in three sizes (6", 8.75", 12") and range in price from $7.99 to $19.99.  That's much more my speed!


Must remember this the next time I'm throwing a party.  Clear balloons, sprinkle some confetti inside, fill with helium. Takes balloons to a whole new level don't ya think?


Can't quite bring yourself to go bold with a dresser paint job?  Try this instead.  Just a peak of color....so fun!


Should I keep doing these stream of consciousness style posts every so often or are they too much randomness crammed into one post?

Friday, September 23, 2011

Modern Decor: Paloma's Nest Menagerie Kid's Collection

You might know Paloma's Nest from her ubiquitous ring bearer bowls.  Their popularity spread like wildfire and they've been appearing at stylish weddings from coast to coast.  BUT did you know she's also recently released a collection of stunning heirloom gifts for kid's?

Her marching menagerie collection of wheeled animals are handcrafted from the same white clay that put Paloma on the map.  These adorable animal silhouettes are mounted on wooden wheels and are just begging to grace a bookshelf in your little one's nursery.  They come in a large and tiny size and the hardest decision you'll have is picking an animal!  I think the rhino is my personal favorite (rhinos have a special place in my heart).


As if that wasn't adorable enough, the menagerie cuteness continues with her line of animal silhouette chairs and table!  Handcrafted of birch and perfectly pint-sized, they are just the finishing touch for a chic playroom.  I mean...the gorilla chair?!  Seriously...TOO CUTE!
If you love this collection as much as I do, head over to Design Mom where a giveaway is going on.  Someone's going to win, you get to pick your favorite chair!

How to sew a new canopy for your Bugaboo stroller

{UPDATE: While this tutorial is for a Bugaboo stroller canopy specifically, you can really use these same techniques on any stroller brand that has a removable canopy.}

It's no secret that I love our Bugaboo Cameleon.  Sure it's ridiculously expensive for a stroller but this thing is built like a tank (or a Cadillac) and shows virtually no wear despite the fact that I have used it, literally, every day for almost a year.  See what else I can't survive without here.


One of my favorite things about the Bugaboo is how easy it is to remove and wash the fabric liner and canopy.  We have the orange fleece version like you see above and while it was great for my October baby, by January, I found myself wanting something different.  Bugaboo sells tailored fabrics that you can change out on the Cameleon for $99 but they only come in solid colors and...well...I wanted something a little more fun.  

And then I saw this.   A Bugaboo and Missoni collaboration.  (!!!!!!!)  And it could be mine for just...err...$269???    (available only thru Neiman Marcus...do you believe it's on backorder at that price?!)


I decided I'd like to try my hand at making my own canopy cover. I will warn you now that I am not a sewer.  I know my way around a sewing machine thanks to my mom who's a seamstress.  But when it comes to completing sewing projects of my own, I am a total hack.  I just sort of wing it and sew and un-sew until I get it the way I want it.  My mom would probably freak if she saw my "techniques".  That being said, here's how I did it!


The Bugaboo  Cameleon canopy is made up of 3 individual sections.  You'll be cutting out each section individually from your fabric so you'll need to create a pattern for each section.  

SECTION 1:  The small flap at the back of the canopy that stretches it over the seat
SECTION 2:  The back part of the canopy
SECTION 3:  The front of the canopy that contains the the two channels for feeding the canopy's structural "skeleton" pieces through.


Cut off a length of your butcher paper (even wrapping paper will work) and drape it over section 3 of your existing Cameleon canopy.  You can be a little messy with this.  You're really just trying to get a general shape.  Fold the paper around the canopy as best you can and use your Sharpie to mark the edges.  Ease the fabric around the sides and fold it along the back of section 3. 


Cut out section 3 from your paper and label it.  This is important!  If you wait to label the section until after you've cut them all out, you'll easy confuse sections 2 and 3 as they'll look very similiar.

Repeat with sections 1 and 2. 


I chose a Missoni-esque chevron for my fabric.  I knew I didn't want to make a new seat cover, just a canopy so I was looking for something that would coordinate with the orange seat.

I really wanted the chevron on the inside of the canopy as well as the outside so I needed 2 pieces for each of my sections.  If you're ok with the inside of your canopy having just the back of your fabric then 1 piece of each section is all you'll need.  But I think lining the inside gives it a more finished appearance. 

I folded my fabric in half and laid out each section of my pattern, making sure to keep the chevrons running horizontally for each section. 


Cut everything out, being sure to put a light label on the backside of your fabric so you keep the sections straight.  


Place right sides together of your section 2 pieces and pin, leaving the ends open.  Turn the entire piece inside out (so that the right side is now out) and iron.


Section 2 is now 90% done. 


Section 3 is only slightly more complicated than section 2 because of the built in channels you need to sew to allow for the canopy's structural "skeleton".  You can see in the image below what those channels look like on the original Cameleon's canopy.  


Place 1 piece of your section three fabric right side down on your existing canopy.  With your tape measure, measure the length across the canopy following the curvature of the structural skeleton. If I remember correctly, this measurement was 39".  Cut two  2" x 39" strips of fabric and pin them in place.


Sew each strip onto the wrong side of section 3.  Remember to leave the ends open so you can feed the structural skeleton through! Once this step is complete, you'll be able to thread it onto your canopy.  You've just finished half (the inside half) of section 3. 


Now we need to create the outside of section 3 so we can hide all that structural stuff!  Place the piece of section 3 that you just sewed (with the channels) right sides together with the other piece of section 3 that you cut back in step two.  Again remember to leave the ends open so you can feed the structural skeleton through!


Flip the entire thing right side out and iron.


Thread it onto the canopy.  Section 3 is now 90% done.


Sorry for the lack of photos for this step but it's actually the easiest of all three.  Place the two pieces of section 1 that you cut right sides together and sew 3/4 of the way around leaving the entire bottom side open. 


Drape your completed sections 2 and 3 over the canopy.  Match up the edges along the middle and bring them right sides together.  Pin in place and sew.

Do the same thing with sections 1 and 2 (sorry, no pic of that but do it just like you did sections 2 and 3 above). 

Weave all 3 now sewn together pieces onto the canopy structure.  Once you have it on your canopy, you can make any final adjustments you need to to the length of the open sides.  Remember we've left them unfinished up until this point so this is the time adjust the lengths and cut away any extra fabric. 


Optional Step:  

The original Bugaboo canopy has tiny elastic loops sewn into the ends that weave throu
gh the canopy structure.  I forgot to take a photo on my canopy but here's a good photo that illustrates where they are.  They aren't necessary but will hold your canopy nice and tight to the frame if you choose to add them.  Simply sew 1/2" wide elastic loops onto the edges.  Use black elastic so it blends against the canopy structure.


I didn't have black and I am impatient so I just used some white that I had at home. 


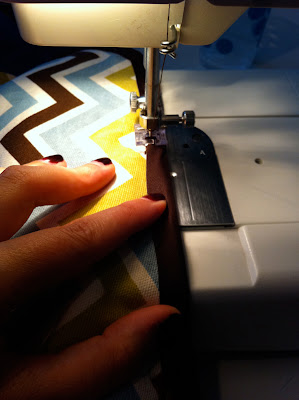
The last, and final step is to finish off all the edges of the canopy with double width bias tape.  Choose a color that coordinates with your fabric.  I used brown.  In the image on the right I had added the tape to just the back of the canopy.  You can really see the difference it makes in finishing off the whole piece. You'll also want to add it to the unfinished bottom edge of section 1 and to the inside seam (the part on the inside of the canopy) of sections 2 and 3. 


Here it is with the bias tape sewn all around the perimeter. 


You're done!  The only thing left to do is strut your stuff on a neighborhood walk!


Total Price for this Project: 
3 yards of fabric:  $26.00 (purchased during Premier Prints Labor Day weekend sale!)
2 packages of bias tape:  $3.18
I had everything else on hand but even if you needed to buy some elastic, you're total would only be about $2.00 more!

GRAND TOTAL:  $29.18  vs. $269 for the Neiman Marcus version! 

Linked up at: